Photos are an important part of every everyone’s life. Nowadays people click a photo on various occasions like Get together, Wedding, Parties, Dinner or a Good Scenic photo to upload it on their social media and also save it as a memory. A good photo requires a good camera, like a Digital Single Lens Reflector (DSLR), which is quite an expensive photography camera to carry around or a really good point and shoot cameras which is small but is still expensive, but don’t worry, as you can always smartphone camera for capturing great photo’s too.
What’s great about smartphones is that they are very small and very easy to carry. Mobile is one of the most powerful most used and dependable all in one gadget ever invented. Which also includes its camera but many times we quickly underestimate it without knowing it’s full capabilities. Believe me when I tell you that your phone is more capable than you’ve imagined. Factors limit its performance, like software, hardware condition, and others.
So by understanding just a few simple tips and tricks you can take good pictures in your smartphone camera.
Basic Smartphone Photography Tips
1. Don’t Forget to Clean your Lens
Dust or fingerprint impression makes the images hazy or blurry. So make a point to always clean your camera lens before clicking any photos. This is one of the most important things you need to do before clicking any photo. You can clean your lens with the help of a microfibre cloth as the most recommended and safest material. Using any other material or cloth may cause scratches on the lens.

Moisten a small part microfiber cloth with water or cleaning fluid, and leave the rest part dry. Do not spray the liquid or water on to the lens directly as it may damage your smartphone. Now gently clean your lens with the wet part of the cloth in a circular motion without applying much pressure, and then followed with the dry part of the cloth to dry the lens. Do this occasionally to prevent gunk and grime from building up
2. Setting the Photo Size and Understanding Resolution
Shooting in higher resolution leads to good quality photos. Here I’ve used Moto G4 Plus for demonstration. The user interface might differ depending on the model and brand, but the basic method is the same.
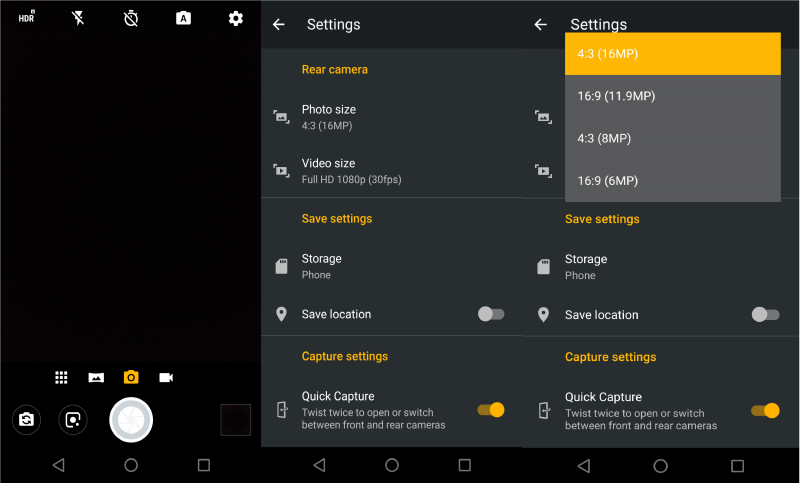
- Open Camera app and go to camera settings.
- Select Photo Size and set it to the highest resolution (MP/Megapixels)
- Don’t forget to save these setting and your good to go.
- While shooting photos, avoid using the digital zoom. Otherwise, the pictures turn out grainy and highly pixelated.
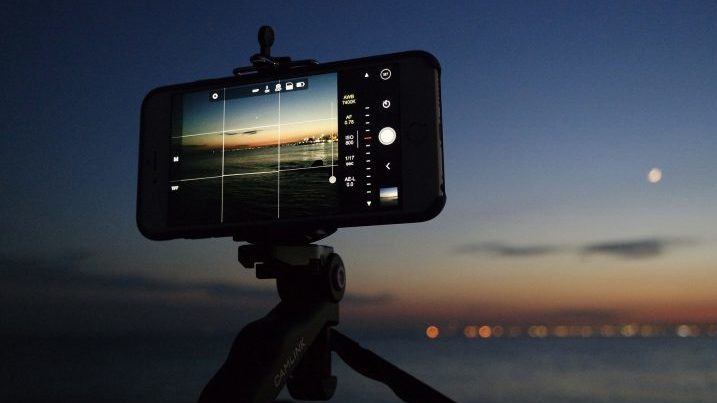
3. Keeping the Phone Steady and Use of Auto-timer
Handheld clicks can sometimes lead to shaky photos. Thus, keeping your smartphone stable and using an auto timer for clicking shutter button can help you achieve sharp, high-quality pictures. Tripods can be used to make smartphones sturdy during low light situations. You can use various tripods available in the market for making your smartphone stable. And auto timer for clear photos.
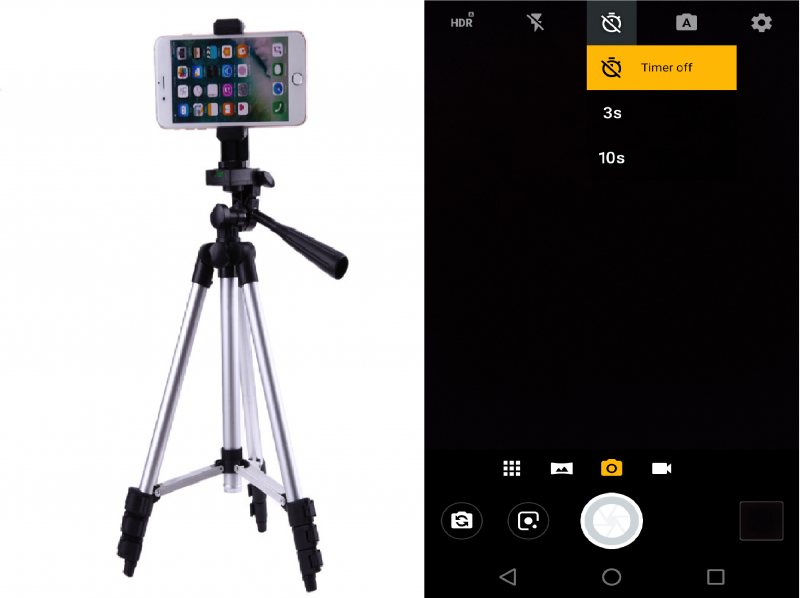
You can always have a complete group photo without having anyone to hold the smartphone by setting it up on the tripod and using the auto timer. You can use selfie stick for a good wider view while clicking selfies with the help of an auto timer.
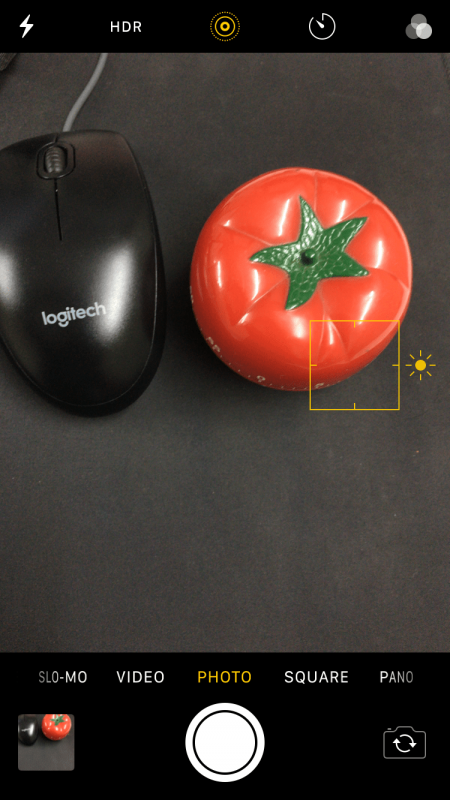
4. Adjusting Focus and Exposure
The cameras have an inbuilt feature of focusing and face detection which automatically detects the face and focuses for a hands-free experience.

You can also manually set the focus by simply tapping on the desired point to focus for 2 seconds. Now the focus point will be set and then you can adjust the exposure by simply scrolling up or + for increasing or down or – for decreasing the exposure as per your need.
Advance Smartphone Photography Tips
1. Composition
The composition is one of the main factors that make your photos look great. As smartphone is a pretty portable gadget it is very easy to experiment and choose different compositions. The composition generally consists of patterns, textures, symmetry, depth of fields, framing, etc. You can always help compose your photos using RULE OF THIRDS. Leading Lines You can experiment using leading lines for a good composition and make the image look good.
2. Rule of thirds
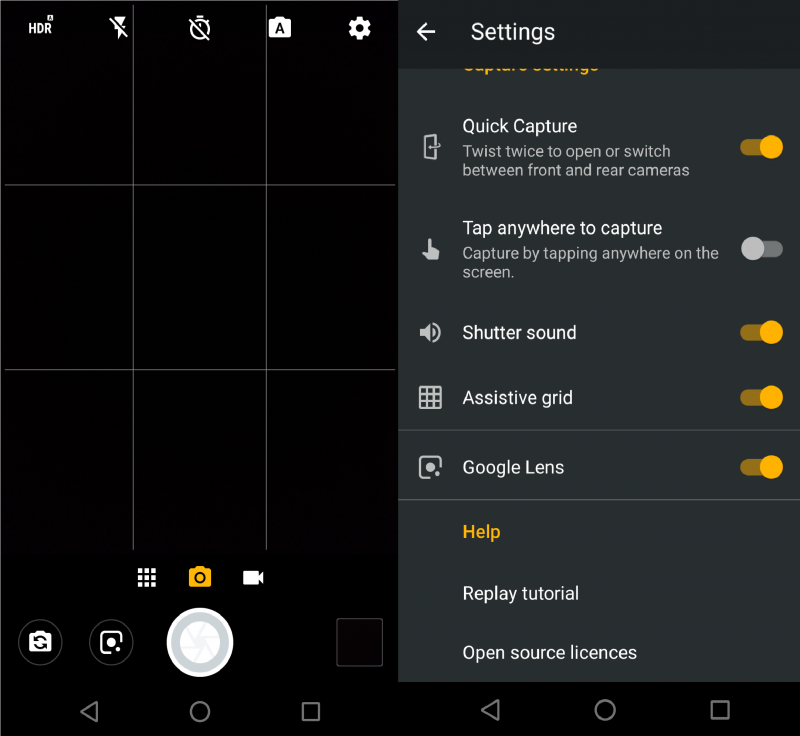
It means you’re basically dividing the frame into three parts horizontally and vertically and placing of the subject in one of the intersecting points which makes your photo look more appealing and interesting. Every smartphone camera has it, you can switch it on or off as per your requirement in the camera setting by selecting GRIDLINES on or off.
3. Lighting Conditions
Lighting conditions are a very important part of photography and the quality of a good photo depends on it. If the light is low the photo might get underexposed causing grains or noise. And if the light is high the photo might get overexposed causing extreme bright images.

Lighting can be controlled at some extent through exposure in your smartphone otherwise it is recommended to click photos in a well lit up area so that your photo turns out to be good. Use HDR (High Dynamic Range) in low light whenever necessary.
4. Using Inbuilt Photo Modes available in Smartphone Camera
Sometimes it’s hard to understand what setting should you opt for in Manual mode for some situations close-ups or speed shots. It really needs the patience to set these settings in manual modes and shoot. But what if it’s really urgent? so here these photo modes come in very handy for a user to use, in a very urgent situation.
5. Using Portrait Mode with Dual Camera
Nowadays, almost all the smartphone is equipped with a dual camera lens. How does dual camera work? Well, you don’t need to be a pro to understand its working. Find a Portrait mode setting in your smartphone and see how it automatically blurs the background of the subject. This is different from Aperture which we will see in Manual mode below. The software is used to detect the subject/person and blurs out everything just like in DSLR. The only downside is that sometimes you may not get expected results. But in most cases, this mode is sufficed to take great photos of a person.
Understanding Manual Mode
Manual Mode as the name suggests it gives you the complete control of the camera. You can set every setting according to your choice and create great photos. The manual mode consists of ISO, Shutter speed and Aperture which are the components of the exposure triangle.
1. Focus
In manual mode, you can focus according to the choice of your subject. You can click both Macro and Bokeh shots which keeps the subject in focus and blurs the background naturally.
2. ISO (Image Sensor)
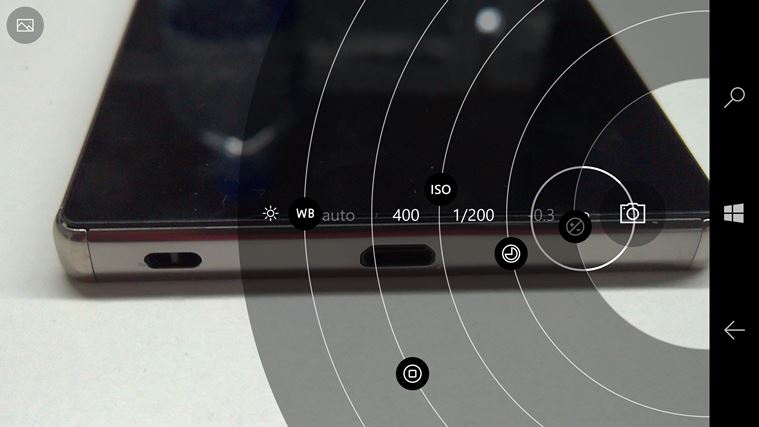
ISO means controlling the sensitivity of light on a photo. Increased ISO results in increased noise and less detail. So it is recommended to use the less no’s of ISO as possible. ISO ranges from 100 to 3200 in a smartphone camera.
3. Aperture
Aperture is a measure of how open or closed the lens’ iris is. A wider aperture (or lower f-number) means more light will be let in by the lens, simply because the opening is larger. A narrower aperture (or higher f-number) allows less light to reach the sensor.
Unfortunately, in smartphones, the aperture is fixed. So you can only change shutter speed or ISO or both.
4. Shutter Speed
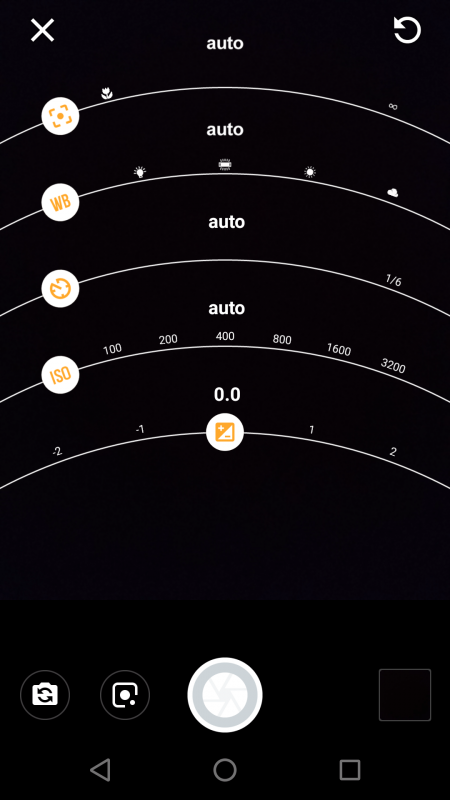
Shutter speed is a measure of how long the shutter remains open and thus, how long the sensor is exposed to light. Faster shutter speeds give the sensorless time to collect light and thus, result in a lower exposure. Slower shutter speeds allow more time for the sensor to collect light and result in a higher exposure. Shutter speed can range from 1/6s to 1/4000s.
Thus following all the above methods correctly and creatively anyone can produce great images from a smartphone camera. Practicing and experimenting photography regularly and learning the creative art of photography will lead to a good photographer. The photographer needs to be a good observer first and understand what he wants to portray, as the camera is only good as its user. So if a person is good at photography he can produce good photos using any camera.