7 Easy yet Super Useful Mac Tricks That Are Gonna Make Your Work Easier
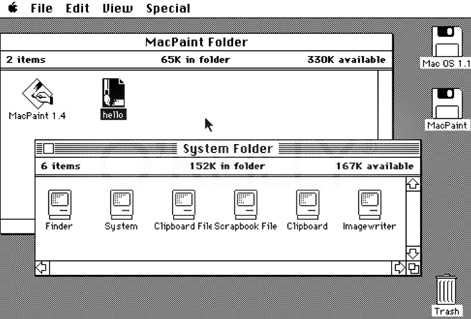
Since their introduction in 1984, Mac computers have been amazing commercial devices. They are loved by everyone be it a professional or an office worker or just anybody around the globe. Macs have several options to make your work easier. Mac, also called Mackintosh, was the first commercially successful computer. It had a GUI (Graphical User Interface) and a mouse instead of a command-line interface ‘MS-DOS’ which was very hard to use.
MacOS powers every Mac and contributes greatly to making Mac computers awesome. I have been using a Mac for around a year now and I think what I explored may help some of you guys do more with your Mac.
So I prepared this list of a few tips and tricks that will help you with your daily chores.
1.Work While You Watch
This trick is basically how you can watch a video in PIP(Picture-In-Picture) mode while you work in another app. It’s been a while now since Youtube got the PIP support. But unfortunately, the PIP doesn’t work outside the browser or even outside the tab. If you want to work while watching a video, this trick has got you covered. It will play the video in a small player around a corner of your screen in any other app such as Pages.
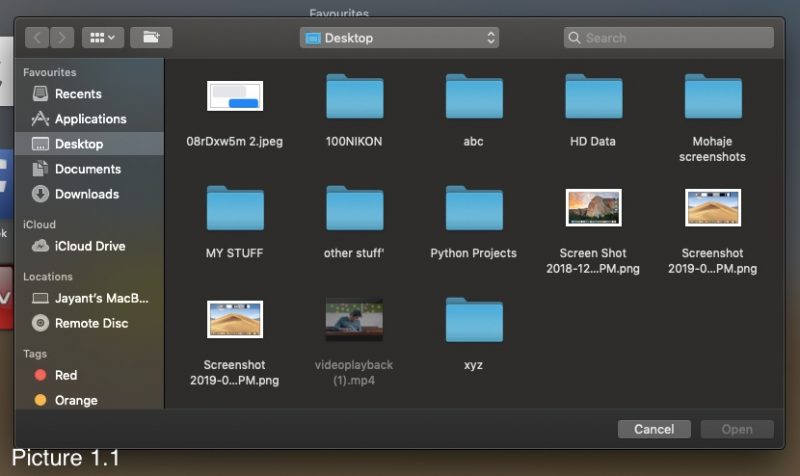
All you need to do is to open Safari and press ⌘ (command) + O. A window will open which will let you browse the video that you wanna play in PIP. There will be a play icon when you hover your cursor over the file, press that icon and click the open button present in the bottom right-hand side of the screen. Now the video will open in the browser.
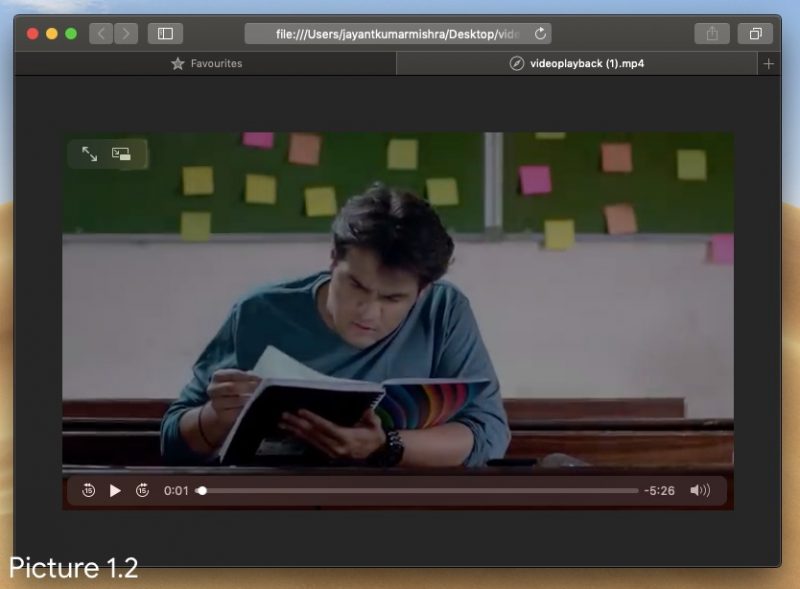
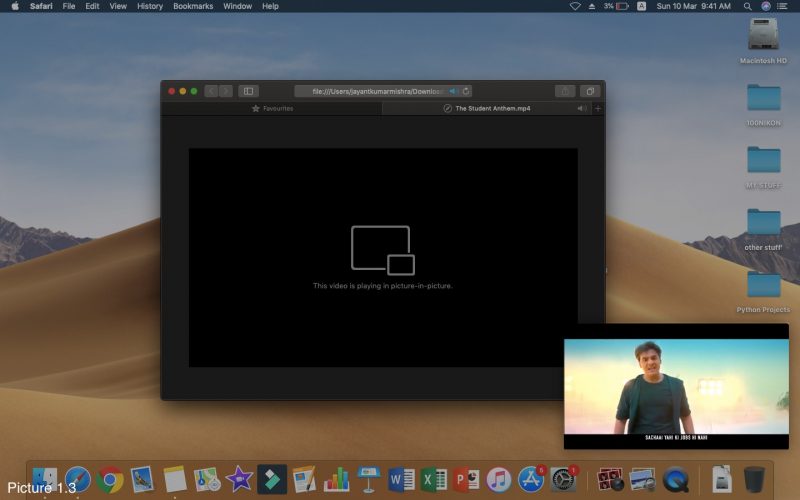
You can change its location by dragging it or change its size by pulling one of its edge or corner. There will be a play/pause button on the player too. Now minimise Safari and open the app you wanna work on. And enjoy this easy And super useful MacOs PIP trick.
2. Don’t Strain Your Eyes!
This trick is particularly useful if you do a lot of work during the night. The dark mode introduced in macOS Mojave was quite a relief but there’s one more thing that you can do to make your night shift better. It’s quite like a blue-light filter or a read mode. Enabling it is easy, open the Notification Centre by swiping left from the right edge using two fingers in your trackpad or clicking the rightmost button in the menu bar.
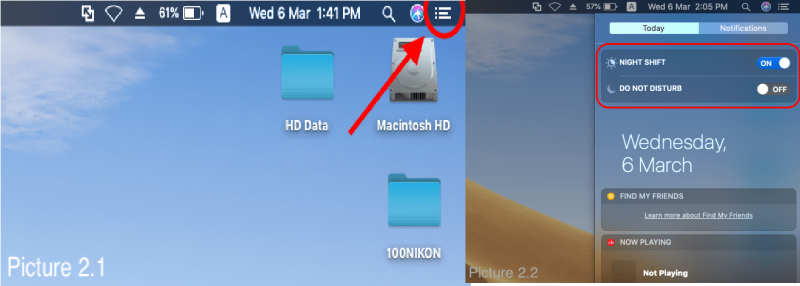
Then, put the cursor to the notification centre and swipe down with two fingers. You’ll find two toggles there, one is Night Shift and the other is Do Not Disturb
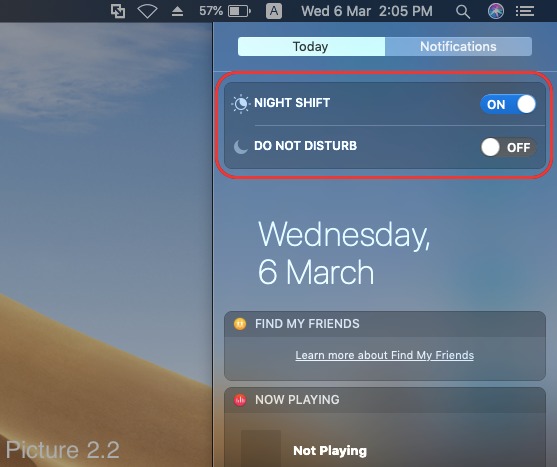
This will shift the colours of your display to the warmer end of the spectrum. Apple says that this feature uses your current location and time to check whether its sunset and accordingly shift the colours. It returns the display to normal settings in the morning.
3. Windows On Mac
There are several apps available for macOS using which you can use Microsoft’s WindowsOS on your Mac. But most of them are laggy and not much useful. You might not believe me but there’s an app pre-installed in macOS called the Boot Camp Assistant, which lets you install WindowsOS on your Mac. (Not kidding).
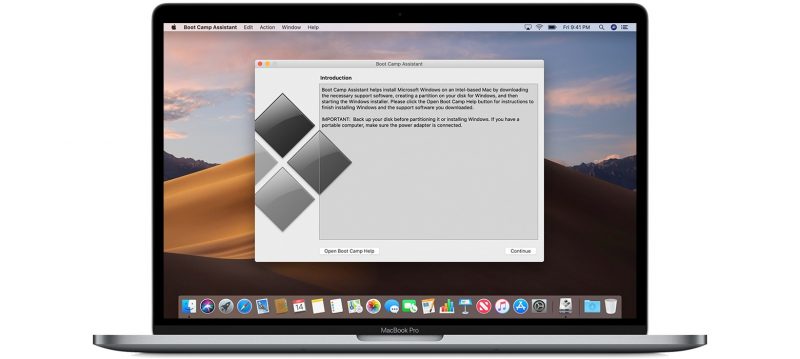
Apple bundles this app with all other apps in macOS. To open this app, go to the ‘other’ named folder in the launchpad or in the application folder. And you’ll find the Boot Camp Assistant. All you need to have is a Mac with an Intel processor and internet connection. To check if your Mac has an Intel processor, open the system information app and in the hardware overview find the processor name which if is Intel then you have an Intel-based Mac. Boot Camp Assistant downloads necessary support files, creates a partition on your Mac and then starts the windows installer. You can get more details here.
Note: This may cost you money as to get Microsoft Windows you need to pay. Get details here
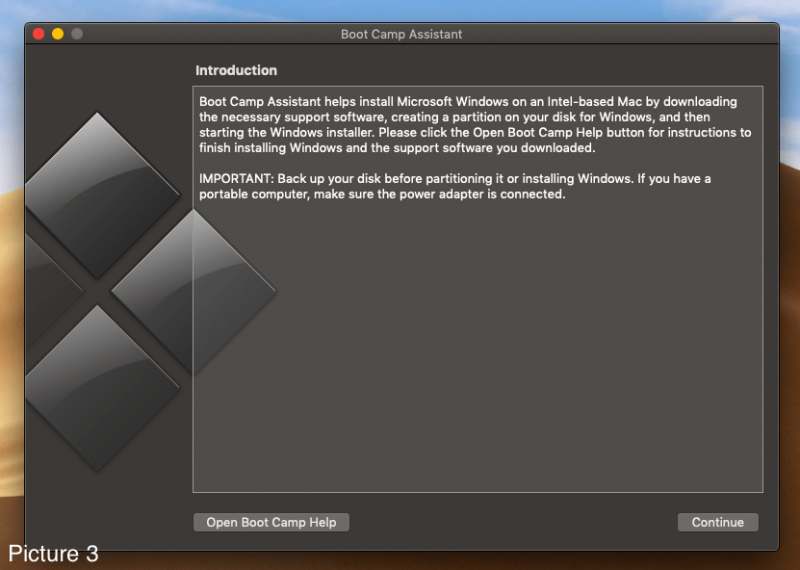
I haven’t used this feature because I don’t want my Mac to have windows. My Mac and most Macs have SSD which offer faster storage but if you partition them then the speed may slow down. I love macOS and I don’t fancy windows a lot so this feature is not for me. Any data loss due to this feature will not be my fault, better back up all your data before beginning to install windows.
4. Use Sho-Fos!
Before you Google Sho-fo, let me tell you it isn’t a word. Instead, it is the short form of the word ‘short form’ ?. Yeah, I know it’s quite funny but admit it, we people are so lazy that we use short forms of everything like if you use WhatsApp or Instagram or any other social media service then you may know that tbh stands for, to be honest, and likewise btw stands for by the way.
My point is at times we have to write the short form (or maybe Sho-fo’s ?) and sometimes we have to repeat the same long phase full form’s (or maybe Fu-fo’s ?) many times, We may copy paste it, but it can be a mess when there’s more than one phrase that you have to write many a time. So to your rescue, here is a trick! You can assign custom phrases to custom sho-fos (short forms) on your Mac which will make this task easy-peasy.
Let me show you how to do this. Go to the Keyboard Preferences of the System Preferences app and Text tab. There, you’ll find a table with the heading ‘Replace’ and ‘With’. Below that table is an add button. Use that to make your custom sho-fos. You can use symbols or emojis in the With a table to use it faster.
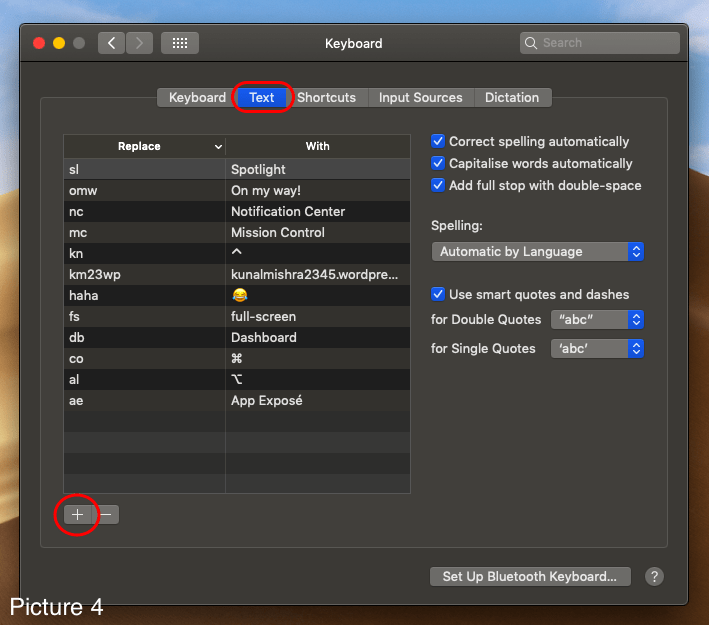
Once you make your custom sho-fos and add them to this table, then the next time you’ll write that sho-fo, your Mac will replace it with the phrase you assigned to it. Given that these sho-fos will only work in pre-installed Mac apps and some other apps. Like, from that picture you can see that I have a list of sho-fos like haha which gets converted to ? every time I write it and he gets converted to App Exposé which has helped me speed up my writing. Let me just make it clear that there’s no word like sho-fo and its a funny creation by someone I don’t remember but I used it here so as to make this easy yet super useful mac trick more interesting. So have fun shows-fo-ing!?
5. Aah That Corner’s Hot! ?
Well, don’t go to the title. At times when closing a full-screen app, you move your cursor to the extreme top left-hand side and then the Mission Control opens. I face this problem a lot because the ⌘Q key quits all windows and if I want to quit only the current window then I have to take the cursor to the top left-hand side of the screen and click that red button but most of the times, I take my cursor to the extreme top left corner and the Mission Control open which I actually don’t want to open.
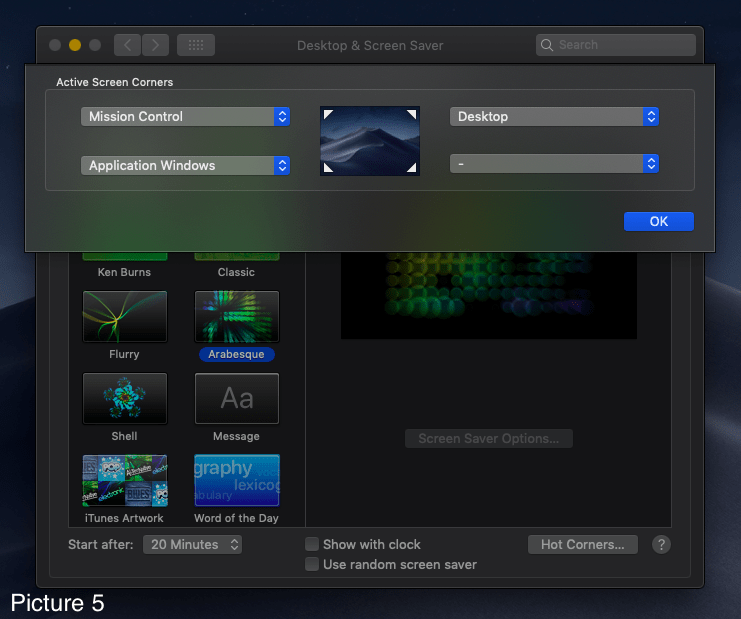
So if you too are facing this problem then this easy yet super useful mac trick has got you covered. There’s a feature in macOS called hot corners via which when you take your cursor to an extreme corner of your screen certain things (or spaces might be a better word) get opened. If you have never disturbed the hot corner settings then putting your cursor to the top-left corner will open Mission Control, putting it to top-right will show you the desktop (this doesn’t work in full-screen apps), bottom-left will open App Exposé (show you all windows of the currently opened app, this doesn’t work in full-screen apps), and bottom-right has nothing assigned to it.
To assign or change the hot corners,
- Go to Desktop & Screen Saver preferences of the System Preferences app
- Go to the Screen Saver tab
- In the bottom left corner of the app window, you’ll find a ‘Hot Corners…’ button
6. Use Emojis Quickly
We all use emojis for different purposes, but one thing you may have noticed that using an emoji in a smartphone or iPhone is easier than using it on a Mac
One way to make it easier to use emojis quickly is to assign a custom short-cut to it like told in the 3rd trick. I had assigned the short-cut ‘haha’ to ? and whenever I write ‘haha’ it changes into ?. But assigning a short-cut for each emoji is not a good technique as it can be really lengthy. So, again at your rescue is my trick.
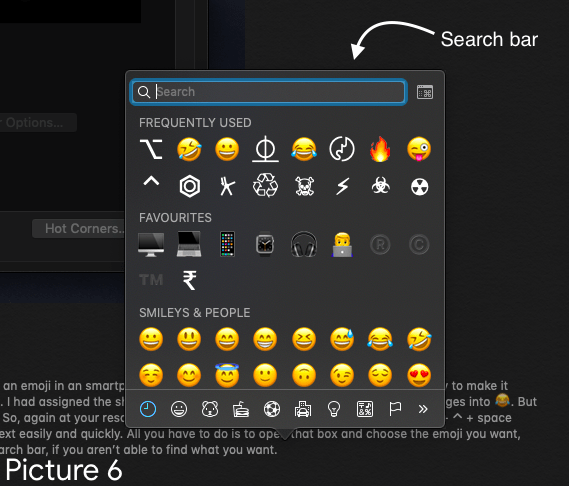
While typing anywhere, you can press ⌘ + ⌃ + space (command + control + space) to open the emoji box which lets you add emojis to your text easily and quickly. All you have to do is to open that box and choose the emoji you want, on it and it will appear where you are writing. That box has even got a search bar if you aren’t able to find what you want.
7. Shoot The Screen Better!
Along with many awesome features introduced in macOS 10.14 Mojave, was the feature that made shooting the screen better. Yeah, I mean a pretty nice variety of screenshot tools. So, most you guys must be using the key combination ⌘-shift-4 to capture a screenshot.
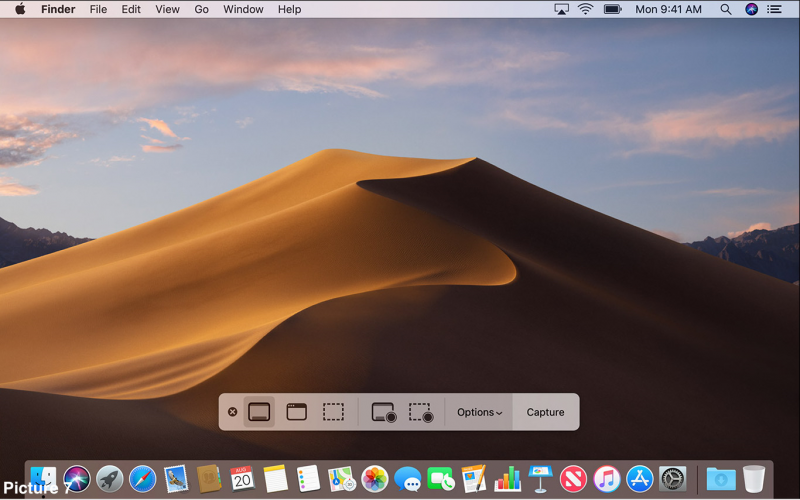
Try using ⌘-shift-5 which opens a box with some buttons that let you Capture Entire Screen, Capture Selected Window and Capture Selected Portion. These were the tools for a screenshot. For screen recording, there are tools like ‘Record Entire Screen’, and ‘Record Selected Portion’. There’s an option button which lets you change the place where you want to save your shots, set a timer, options to remember last selection, option to show floating thumbnail once a screenshot is captured and option to show mouse pointer in the shot. These tools will help you better shoot your screen.